Friday, June 29, 2012

Know When To Toss It!

Hi everyone,

Today i'm gonna show you how to know when your makeup products start to gone bad. And today I’m giving you a few tips and key expiration dates to keep in mind when it comes to your beauty products! So, here we go!

Lipstick: Some experts say 1-2 years. Some say 4 years (especially when stored in your refrigerator!). So how do you know when to toss an old tube? Take a big whiff of it! If it smells rancid, throw it out, it's donezo.


Lipglosses/chapsticks:
2 years

Powder eye shadow: 2 years


Cream eye shadow: 12-18 months


Eyeliner: 3 months

Mascara: 3 months

Powder blush: 2 years


Cream blush:
6 months

Oil-free foundation: 12 months


Cream foundation: 18 months


Concealer: 12-18 Months


Lotions: 2 years

TIP: If you’re not already in the habit of doing so, get in the habit of labeling your beauty products with the date of first use. This way, you’ll always know how long you’ve been using a product and when it’s time to pitch it.

DIY Lip Balm

Hi everyone,

Have you ever made your own lip balm? There are a lot of different methods and ways to make all sorts of lip balm, but here’s a really simple, fun, and inexpensive way to make the basic stuff in no time at all!

What you need:

  • 1 tsp. coconut oil
  • 1 tsp. almond oil
  • ½ tsp. grated beeswax

Directions:

Combine all the ingredients in a microwave-safe container and pop it in the microwave. In 1-2 minutes, the beeswax should melt, and that’s it! You just made your own lip balm.

lipstick


If you want to get a little fancy…
You can add a bit of your favorite lipstick for extra color by stirring a dab in with the heated mixture. Martha Stewart Living has some simple instructions for adding essential oils and honey for scent and flavor as well.

color lip balm


If you want to get a lot of fancy... Get creative with the containers you put your gloss in - even make some labels! You can usually find little containers and tins at most craft stores, otherwise, Specialty Bottle has a huge selection.

I hope to make a video on this when I get a chance, but for now, give this a try and see what you think! Post any fun suggestions or additional tips you have in the comments below. Have fun!

Thursday, June 28, 2012

How Would You Wear Glow In The Dark Makeup?

Hi everyone,

Last month, Make Up For Ever introduced a line of glow-in-the-dark makeup that looks so fun to try and really easy to work with. Fluo Night (available at Sephora) is a fluorescent powder that glows in the dark under UV light. It comes in seven colors, plus an “invisible” white color:

To use, all you have to do is blend the powder into your regular makeup. It's powder format means you can put it anywhere, really; patting it into your lipstick, mixing it into your eyeshadow powder, and applying it to the tips of your hair are just few fun ideas!

Applying the makeup isn’t the tricky part; finding the UV light that activates it is! Laser tag, anyone? ;)

How To Reduce Cellulite With Coffee

Hi everyone,

Did you know that your favorite morning beverage can actually be used as a powerful beauty elixir? Coffee, when applied topically, has the ability to not only leave you with a glowing complexion, but also help reduce cellulite!

What I like to do is take my leftover coffee grounds [after the coffee's already been brewed] and combine them with honey. This mixture can be then be used as a scrub on both the face and body. Just apply as you would a normal scrub, exfoliate and rinse when complete.

coffeeadd honey

mix it upexfoliate

Even though this mixture only contains two ingredients, they are both “super ingredients” loaded with tons of benefits: Honey is a natural anti-inflammatory and purifying agent. It both moisturizes and softens the skin, and in this case, it also functions as a good “glue” for the mixture. Coffee, too, does a number of things for the skin. When applied topically, the caffeine and antioxidants work to tighten and energize skin while also promoting circulation. This gives it the ability to smooth out skin and reduce that hated cellulite. It has also been known to reduce varicose veins as the result of its ability to shrink blood vessels.

The drink that wakes you up each morning can wake your skin up in wonderful ways, too! :)

The BB Cream Craze

Hi everyone,

BB Cream has exploded onto the beauty scene in the last few months here in the states, but in Asia, it's been around for years. These products first became popular in Korea and Japan, but have become a huge hit elsewhere in the past year and their popularity only seems to be growing. A lot of you have been asking for my take on them, so I thought I’d cover the craze in today’s blog. : )

The “BB” in BB Cream can stand for either “Blemish Balm” or “Beauty Balm.” They are probably best thought of as a combination of tinted moisturizer, serum and primer; they offer the functionality of both a primer and a tinted moisturizer but also contain many of the benefits of a skin serum. Plus SPF! They became popular because a lot of stars in Asia used them to get that perfected skin.

BB Cream Craze


There are so many BB Creams out there now, so if you’re looking to buy one, here are some things to keep in mind: A good BB Cream will be lightly tinted, have a satin finish and feel very clean. You don’t want the texture to be too pasty or the coverage to be too heavy. Also, the product should not feel sticky when applying; it should feel almost like water on your face. The downside to BB Creams is the color range. You might not have a lot of options to work with because the colors are usually light to medium. Because of all the beneficial ingredients like SPF, primer etc., BB Creams will usually have an ashy color to them. You have to really blend, so if you're looking for a product that will cover your imperfections, BB Creams may not be for you. You already have to have relatively good skin to use BB Creams because the coverage is very light.

I personally prefer to use foundation because it provides a cleaner finish and photographs better, but BB Cream is great for quick fixes. I think Missha BB and Lioelehave an amazing selection and Skin Fu is good too. You can also find a bunch of good products on Pretty & Cute.

I hope this helps!

My Makeup Collection

Hi everyone,

Here's why: My collection is constantly changing. On top of that, I haven't had the time to really organize my "collection." But I can show you some snapshots so you can see how I work!


This is not my entire makeup collection, in fact, these are just current products that I am experimenting with to help brainstorm different looks. What I typically do is just try out and play with different products until I find something I really like, and then I film the next day.

You can understand why a lot of my girlfriends like to come over; I'm always loading them up with freebies :) Sharing is caring.

What's your makeup collection like?

xoxo-

My Ultimate DIY Brush Cleaner

Hi everyone,

Today, I’m going to share with you my ultimate DIY brush cleaner and give you a refresher lesson on proper brush cleaning and care!

If it isn’t already, washing your makeup brushes should be a permanent part of your beauty routine. Cleaning is so important for the quality and life of both your brushes and your skin. Think about it – there is so much makeup, oil, bacteria, and dirt trapped in an unclean brush, and unless you wash them, you’re rubbing it all back into your skin…um, gross.

Bottom line: you should be washing your brushes frequently. Fancy brush shampoos can be too expensive for how much you should be using them, and baby shampoo does not disinfect. This method, however, contains all super inexpensive ingredients and supplies, most of which you probably already have in your kitchen. I learned this technique in oil painting class and have been using it for years :)

My Ultimate Brush Cleaner

You Need:

  • Basic dish soap (to disinfect and clean)
  • Extra virgin olive oil (to recondition the bristle hair after it’s stripped of oils and disinfected by the soap)
  • Dinner plate
  • A hanger
  • Chip clips
  • Brush guards

Steps:

  1. Pour the dish soap onto the plate – you don’t need too much
  2. Add a little bit of extra virgin olive oil. The ratio should be approximately 2 parts dish soap to 1 1/2 parts EVOO and should look something like this:
    And that’s it for the shampoo! Now it's time to begin cleaning.

  3. Take your first brush and stir it up in the mixture in a circular motion (you should see some of the makeup start to come off in the mixture).
  4. Then wipe the brush pack and forth on your hand to release the makeup from the brush. This removes all the pigments and kills the bacteria.
  5. When you’re done, place the brush on a paper towel.

  6. Repeat steps 3-5 with the remainder of your brushes.

  7. Once you’ve cleaned all your brushes, you’ll need to rinse them off under warm water in the sink. Swirl the brush under the water into the palm of your hand to thoroughly clean it off. (NOTE: do not use hot water, the high temperature will damage your brushes)
  8. Continue to do so until the water is clear when you squeeze the brush.
  9. Once they are all rinsed clean, gently wipe them dry with a paper towel and blot out the excess water. (Regular paper towels work best because they will not leave lint on the brushes)

Storing and Drying Your Brushes

Important Note: Do NOT let your brushes dry standing up with the bristles facing upwards – this will ruin them!! Water will drip down the bristles into the brush and loosen the glue holding the hairs together. Eventually, the hairs will fall out and the handle will be ruined too.

Hang dry your brushes upside down the following way:

  1. Take the appropriate brush guard for the brush you are working with – starting at the end of the handle, slide the guard on over the end of the brush all the way to the bristles till it covers the brush hair completely.
  2. Take your chip clip (any snack storing clip with a clamp) and clip it over the base wire of your coat hanger (make sure any paper is removed from the hanger prior to this step) – you want the chip clips to hang from the hanger.
  3. Clip your brush onto the hanger by inserting the end of the brush handle into the clip clamp. The hairs should be at the bottom facing downward. Here's how I hang mine:
  4. Do this for all of your brushes, and hang the hanger from a doorknob or towel rack to let the brushes dry.

A Couple Notes on Brush Guards:

  • Brush guards are great because they keep your brushes covered and protected from dust and dirt. They also help retain a brush’s shape and will preserve it for longer. You can get them from The Brush Guard if you do not already own some.
  • To clean your brush guards, use hot water and soap – let them sit in a bowl with hot water and soap for about 5 minutes, remove and rinse off.

When To Clean:

  • Foundation brushes: daily or after each use – liquids will trap more bacteria than powder and need to be cleaned more frequently
  • Powder/Eyeshadow brushes: after each new color
  • Eyeliner brushes: daily with your foundation brushes – anything going in your eye needs to be clean to prevent infection.

Happy cleaning, everyone! Your skin and your brushes will thank you!

5 Steps for making false eyelashes look more natural

Hi everyone,

For special evening events or a night on the town, false eyelash strips (in lieu of individual lashes) provide glitz and eye-popping power to make the time and effort worth it. Armed with a few cool tricks up your sleeve, you can easily blend them in with your natural lashes so they don't look overly obvious. Celebrity makeup artist and Vanitymark Cosmetics founder, Brett Freedman, offers a few ways to make the whole false eyelash strip application go more smoothly.

  1. Cut the strip lashes so they are as long as the length between the center of your eye to the outer corner. "Remember it's all about blending your inner lash line lashes with the faux," Freedman explains. Avoid starting too close to your inner eye, because it's "a dead giveaway and difficult to glue down in that naturally sparser area."
  2. Spread a thin line of glue along the thread, and blow on it a little to allow the glue to become a little dry and tacky.
  3. Use your fingers to apply the fake lash to the outer corner of your lash line (and not your lid). Then, use tweezers to press the strip down securely along the lash line. If you are hesitant, Freedman promises it gets better with practice. "It's like riding a bike," he explains, adding, "Once you do it a few times it's way easier."
  4. Hold down both edges of the false lash for a few minutes until the glue dries to lock them in place.
  5. To finish, do a quick pump with an eyelash curler and top off with a few coats of mascara to blend the natural and faux lashes together.

-xoxo

YOUR DIRTY, DIRTY PHONE

Hi everyone,

These days, our phones go everywhere with us – the bedroom, the bathroom, the classroom, the nightclub, the grocery store, the gym, and just about everywhere else. Think about all those places for a minute… and then think about how these phones aren’t just attached to our wrists; they’re attached to our faces. *Shudders*

Because of all of the environments and germs that they are exposed to, our phones accumulate a lot of germs. Add in the fact that we use our hands to operate them and it’s one big, nasty germfest. Now think about how every time you talk on one of them, you’re pressing these substances against your beautiful, delicate skin. Unless you’re using an earpiece or speaker, you’ve basically just applied a film of filth on your face. Yuck!

It’s obvious, then, that phones can pose a very real problem for your skin. This isn’t news to anyone, but it’s a really good reminder… Our parents and grandparents probably never thought to associate phone-care with skincare! Now, though, you gotta. Here are some tips on how to wipe that baby down and help reduce breakouts on your face:

  • Before you do anything, it’s safest to turn off your phone, remove any case, and take out the battery if you can. Do your research and check out what the manufacturer recommends. The Internet is a gold mine too! Here’s a useful article with some more info.
  • If your phone has buttons, you can use a dry q-tip to first get any dust out from in between the buttons.
  • If you have a plastic phone backing and/or a screen protector on the front of your phone, you can use alcohol or a disinfectant on a soft cloth to gently wipe it down. Use as little as possible and check up on what’s recommended for your model beforehand. (Apple actually recommends that you just use a lint-free cloth to remove any oils and substances on the surface.)

Too much blush!


Hi everyone,

Another big beauty pet peeve of mine is too much blush. I just think it kind of overwhelms the face and it looks cheap. It's hard though, because there’s a fine line between rosy, doll-like blush and too much blush. When you have too much on your whole face gets red and it gets a really forced flush. Overall it just looks really fake, and no one wants to look fake!

I think there are two main reasons why a lot of girls make this mistake. One, they’re not using the right brush, so they’re over-applying and over-powdering their faces without realizing it, and then maybe they’re just leaving without checking. Or two, their blush and/or brush aren’t very good quality, so they feel like they have to apply more and more to get the color they want.

This one’s also tricky because when you’re doing a gradual build with your blush, you sometimes tend to forget how much you’ve already put on. You’re just applying and applying and waiting to see color, and when you finally do, it’s bright and it’s crazy.

The easiest way to fix this (and this will even happen to me sometimes when I’m applying makeup on the go and I forgot to clean the blush brush that I have with me) is to add another layer of face setting powder (not translucent, but actual powder) to your face. This will help remove and cover up a bit of the extra blush.

Beauty School: Essential Brushes


Beauty School: Essential Brushes

Hi everyone,

You may not think about your makeup brushes as often as you do the type of foundation or color eyeshadow that you use, but that doesn’t mean that your brush collection isn’t every bit as important to your makeup collection as the individual products that you swear by! Your brushes are an essential part of your makeup collection…you can have all the best cosmetics in the world, but without brushes, your application and finished look will suffer.

A lot of times people aren’t sure what kind of brushes they should buy. If you have a relatively small makeup collection, are on a tight budget, or don’t have any makeup brushes to begin with, it can be confusing. So over a few Beauty School posts, I thought we could focus on these necessary tools – from how to maximize your brush budget as a whole to the detailed descriptions of each individual brush!

To start things off, today I’m sharing what I think are the absolute essential makeup brushes that a girl should own. Here are the seven you should make sure you have in your collection:

  1. A foundation brush
  2. Powder brush
  3. Blush brush
  4. Eyeshadow brush
  5. Fluffy brush
  6. Liner brush
  7. Small eyeshadow brush

Do you agree with my list? What other brush-related questions do you have? Let me know by leaving a comment below! ;)

How to Prep the Skin For Makeup


The easiest way to make your makeup look smoother and prettier (and last longer) is to first prepare your skin accordingly. So after you wash your mug and pat it dry, what's next? Find out your go-to guide for getting the skin ready premakeup when you read more.

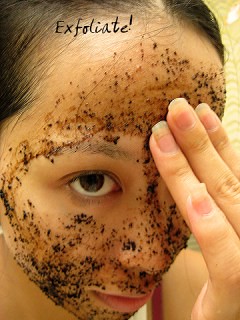
Exfoliate: Once the face is washed with a cleanser appropriate for your skin tone, exfoliate with either a physical (like a grainy scrub) or chemical (such as a liquid) exfoliator that's gentle enough for daily use. Sloughing off dead skin cells will help create an even surface for makeup to glide onto. Bonus? Your skin will look brighter because of it. Tip: multitask and use an exfoliating cleanser.

Toner (optional): If you have really oily or acne-prone skin, or if you feel like you still have remaining traces of makeup or residue, a toner can help. It's not a necessary step but can provide extra "cleansing" as needed. It's also important to note that today's toners, unlike their ultra-astringent counterparts of the past, are often also formulated with soothing, calming, and hydrating benefits.

Serum (optional): Whether it's for firming, brightening, or minimizing hyperpigmentation, serums work to treat and correct. Think of them as if they were like vitamins for your face.

Facial moisturizer: Choose a moisturizer according to your skin type. You'll know it's too heavy for you (or that you've overapplied) if your face still feels greasy after about five minutes. Tip: multitask and use a moisturizer with an SPF.

Eye cream: Using your ring finger, pat your eye cream gently around the orbital bone area. By gently dabbing the product in, you'll increase circulation to the area to help move the cream deeper into your skin.

Sunscreen: If you haven't already applied sun protection, now's the time. Remember: apply sunscreen right before makeup.

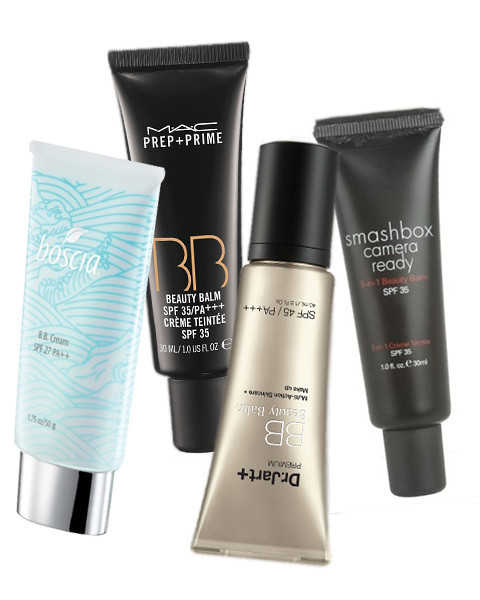
Prime time: Finally, to ensure your makeup doesn't slip and slide all day long, use a primer prefoundation and preconcealer for flawless results. While it might seem like a lot of steps, you'll find that getting your skin in good shape first will give you the perfect palette for which to apply your makeup.

Beauty School: Which Wand?

Hi everyone,

Not all mascaras are created equal, and mascara wands are just as important as the actual formula inside the tube. With so many different shapes and sizes to choose from these days, it’s useful to know what each wand does. From big to small and combed to curved, this Beauty School post will go over a few of the key differences in wand anatomy to help you get the most out of your mascara.

Beauty School Which Wand

Brush Shapes

- Straight wands: Most mascaras come with a standard straight wand. This is the basic shape and is the most natural to use.

- Curved brushes have the arc of your lashes and eye shape in mind, and are meant to give you an easy, all-over application.

- Heart-shaped brushes are a combination of the different shapes. They start out as standard brush heads, and taper in to form a narrower point at the end. This design is meant to give you precision when you need it, as well as a normal brush when you don’t.

- Round mascara heads are relatively new. The small, spherical shape is supposed to allow you to reach each and every lash easier than if you were using a larger brush.

Bristle Types

- Standard brush hairs are typically made out of synthetic fibers. These bristly hairs are good for voluminous application, especially when there are a lot of bristles in a single wand.

- Plastic, combed brush heads are good for separation and help you avoid those dreaded spidery lashes.

- Rubber-bristled wands have become really popular and are good for clump-free, voluminous lashes. Mascara tends to dry up less on these kinds of bristles since the formula slides on and off much easier, rather than getting trapped on brush hairs.

- Vibrating or oscillating mascaras may sound strange, but these are great for volume; they do a lot of the wiggling work for you, ensuring that your lashes are separated and evenly coated.

What type of mascara wand do you use? Have you tried all the ones on this list?

How To Choose The Right Foundation Formula

Hi, everyone!

We're excited to bring you another great article from BellaSugar, a fantastic source for beauty news, how-to's, celebrity beauty trends, and giveaways galore. Today, BellaSugar is sharing "How To Choose The Right Foundation"…

How To Choose The Right Foundation

When it comes to cosmetics, foundation is, uh, the foundation of your makeup routine. But choosing the formulation for your skin type, coverage preferences, and desired finish can be tricky. We've already explored how to choose the right shade, so let's get right down to the next step: the basics of selecting a foundation formulation. Find out more when you keep reading.

1. Tinted Moisturizer
- Coverage: Sheer, with a lightweight formulation.
- Who it's for: People with normal to dry skin.

2. Liquid
- Coverage: The most versatile, provides anywhere from sheer-to-full coverage, depending on formulation.
- Who it's for: All skin types. Just read the label for the one that's perfect for you.

3. Cream and Sticks
- Coverage: Medium to full. Gives a natural-looking finish that's easy to build upon or tone down.
- Who it's for: Normal-to-dry skin.

4. Mousse
- Coverage: Lightweight with medium to full coverage.
- Who it's for: Normal-to-dry types, specifically great for aging skin, as it's less likely to cake.

5. Cream-to-Powder
- Coverage: More than tinted moisturizer and liquid formulations, but less than regular creams and sticks. For sheer-to-medium coverage that's less creamy, try a similar, yet drier, dual-finish powder.
- Who it's for: Those with normal-to-slightly oily skin.

6. Mineral Powder
- Coverage: Can build easily from medium to full.
- Who it's for: Medium-to-oily skin types.

What's your foundation formula? ;)

Do Mascara Commercials Need to Get Real?

source: farm4.static.flickr.com

Hi everyone,

Mascara commercials have always been a pet peeve of mine... It’s just hard for me to watch these mascara commercials where they talk about how the mascara can create longer and fuller lashes, but then it's as obvious as the sky is blue, and water is wet, that the models are wearing FAKE lashes!!!


source: http://2.bp.blogspot.com

I mean, if they're going to do these commercials, they should at least use more natural looking fake lashes, but they always seem to choose these CRAZY Gaga fake lashes...

source: www.blogcdn.com

Would you prefer that they didn't use fake lashes at all and just showed the real effect the mascara has on the model’s lashes instead? Would you still buy the product seeing a less dramatic looking lash effect? Or do you like seeing the fake lash look in the commercials and ads, and feel like it’s common knowledge that fake lashes are required to re-create the look in the advertisement?

I’m so curious to know what you guys think about all of this! Let me know your thoughts on this tricky topic in the comment section below.

Bonjour! ;)

Beauty School: Slimy Products

Beauty School: Slimy Products

Hi everyone,

It might sound gross, but snail slime has actually become a popular ingredient in a variety of beauty products around the world.

Wait… what?

Apparently, the active ingredients found in snail extract have been known to slow premature aging by protecting the skin from harmful elements in the environment. Aside from allowing them to slither along surfaces, a snail's slime is rich in glycolic acid and elastin, which also protects their bodies from bacteria, cuts, and other damaging factors. Creams and products containing snail leftovers are also marketed to smooth skin, treat acne and heal burns because proteins in this sticky substance remove dead cells and helps to restore skin.

Most of the slime hype has popped up in South America and South Korea, and can be found in a variety of products from BB creams to body butters. As with other beauty trends, I have a feeling this one will slowly make its way across waters, too.


I hope you enjoyed it ;) Bonjour!


Beauty Tip: Foundation Application

Hi everyone,

I love using a brush to apply my foundation. Fingers and beauty sponges just don’t cut it for a variety of reasons. I’m going to show you the difference between these application methods using a lemon because the skin of a lemon is similar to that on our face. Here’s my breakdown:

Fingers – Using your fingers to apply foundation will exaggerate your pores and leave you with an uneven finish, because foundation doesn’t blend well with our fingers – no matter how soft our hands may be.

Foundation Application with Fingers

Sponge – A sponge will absorb most of your foundation, thus wasting your product and leaving you with less coverage than you’d like.

Foundation Application with Sponge

Brush – Like an artist blending paint colors, a brush will provide you with the most even application because you’ll have more control over the product. Using a brush will decrease the likelihood of exaggerated pores and leave your skin with a very natural finish.

Foundation Application with Brush


So, what will you applied with? Fingers, sponge, or brush? haha.


Do you have any quick beauty tips you’d like to see? Let me know in the comments!


I hope you love to read this thread;) Bonjour!


This beauty tips is all from http://www.michellephan.com/

Saturday, June 23, 2012

Intoduce you, Michelle Phan!

Heyya everybody! Yesterday I little bit discuss about michelle phan on previous thread, and today I wanna introduce you, Michelle Phan! Yes, she is an is an American make-up instructor who posts make-up and beauty tutorials on Youtube, sometimes under the online alias ricebunny. Michelle Phan was born in Boston, Massachusettes on April 11, 1987.


Phan joined Youtube on July 18, 2006 and has created over 200 videos. As of February 2012, she has garnered over 585 million views and over 1,900,000 subscribers, making her channel the most subscribed beauty channel on YouTube! (how cool is she!) Phan is known for her video style that incorporates her voice-over instruction with music and text subtitles. Popular beauty tutorials released on Phan's YouTube channel. Her most popular videos include the "Lady Gaga 'Poker Face' Tutorial" with over 30,000,000 video views on YouTube!

In 2010, Phan was hired by Lancôme. Since then, her videos have included Lancôme beauty products. The partnership with Lancôme led to a backlash by fans concerned with animal rights. According to the PETA website, Lancôme, owned by L'Oreal, continues to test on animals.

FYI, she's have a short film in her Youtube. I have watched it three times, but i've never get bored at all haha.

You can check at her website http://www.michellephan.com/, her youtube http://www.youtube.com/michellephan#, her twitter https://twitter.com/RiceBunny, and also her Facebook http://www.facebook.com/MichellePhanOfficial.

Thanks for read this thead, and I hope you like it! Bonjour~! xoxo

Friday, June 22, 2012

Paper Blush by Mai Couture

Hey all fashionista in the world! Yesterday I've seen michelle phan's video on youtube. And I've being wonder what she's wear on her cheeks. After I watch that video, then I know that thing is named Paper Blush. Here's the blush Image 1


it have 4 colors that you can wear ^^ Choose your own color! XD


PRETTYFUL

prettyful.jpg

SUNSET BLVD.

sunsetboulevard.jpg

VENICE BEACH

pantone-venicebeach.jpg

UPTOWN

uptown.jpg


Image 1

The coolest thing is.... You can wear your blush without a brush! haha. Add color to your cheeks anytime with the remarkable blush paper. The lightly powdered blush paper has a hint of shimmer to give you the perfect look with every application. Gently rub paper to cheeks to get an instant vibrant look. Layer color if necessary for more depth. Made for on-the-go beauties. Use daily as needed. :D

This Paper Blush is PARABEN FREE and TALC FREE. :)

How to use the Paper Blush:
Image 1

Oh I forgot something! For more added value, purchase papers with the stylish chic wallet. The wallet is the prefect accessory to protect your papers from damaging in your bag. The makeup essential that fits anywhere. Don't leave home without it. Each wallet holds two booklets. Create your own combination that fits your daily needs. :D

Here's the stylish chic wallet ;)
Image 1

Pstttt.. FYI, This paper blush is only $17.50 :D

Oh yeah. by-the-way, you can check the Michelle Phan's video in this link >> http://www.youtube.com/watch?v=tciGzXIn96A&list=UUuYx81nzzz4OFQrhbKDzTng&index=1&feature=plcp .

Or you can purchase this paper blush here ;) http://www.maicouture.com/products/BLUSH-PAPIER.html

Thanks for read this thread ;) I hope you like it! Bonjour~!